


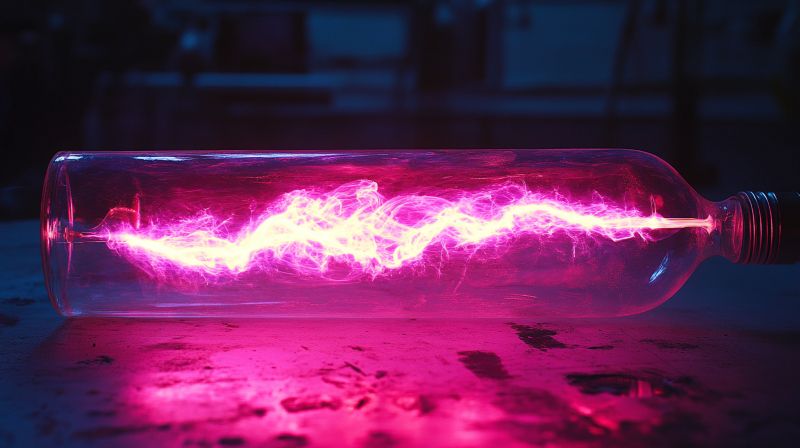
Mad science hack: How to make a plasma tube from a kombucha bottle
Science is cool and, more often than not, it can help you create beautiful (and super-useful in educational settings) stuff like your very own plasma tube out of an empty kombucha glass bottle.
Ad
As it happens, Simranjit Singh made a sealed plasma tube out of a glass kombucha bottle and shared the process in an article on Instructables, as well as on his YouTube channel, so anyone who wants to can copy his strategy to the T.
According to Singh, you’ll only need to vacuum this plasma tube once instead of vacuum pumping every time you want to use it.
To get started, you’ll need to equip yourself with one thick glass bottle (Singh used a 1.4l Synergy kombucha bottle), one glass end cap (he used a candle holder from Dollar Store, two 8mm bolts, two-part silicone, two-part epoxy (optional, as you can just use silicone), a vacuum chamber, 8mm diamond drill bits, and a high-voltage power source to test it.
Ad

Step 1: Preparing the bottle and making holes
First, Singh cut the bottle because he wanted to make it more symmetrical (this is optional). He carefully drilled holes at the bottom of the bottle and the same-sized hole in the end cap (candle holder).


Step 2: Sealing the bottle and end cap
Then, he used two-part epoxy to seal the bottle end (alternatively, you can use two-part silicone). For the end cap and the place where the bottle meets the end cap, he used two-part silicone. He left epoxy to dry for more than 48 hours, and silicone for over 24 hours.


Step 3: Vacuuming
He then put the bottle in a vacuum chamber for at least 10 minutes, placing a 5lbs weight on top of it so it’s easier to achieve a vacuum inside the plasma tube.

Step 4: Testing
Finally, it was time to test the plasma tube. Singh accomplished this by using his flyback transformer as the high-voltage source. As he pointed out, you can change the length of the arc, as well as its behavior by altering the voltage on the variac transformer.


Conclusion
And there you have it! Your own very cool plasma tube you can keep on your nightstand or give as a present to your loved ones. And the best part? You can easily make more, so all your friends and family can have one. Kids will love it. Other projects you may want to try your hand at could be a Tilt-A-Sketch, laser harp, red-light therapy gear, ‘glasses’ to transcribe text to audio for the blind, or a GPS receiver.
How do you rate this article?
Subscribe to our YouTube channel for crypto market insights and educational videos.


Join our Socials
Briefly, clearly and without noise – get the most important crypto news and market insights first.
Most Read Today
1
Peter Schiff Warns of a U.S. Dollar Collapse Far Worse Than 2008
2Dubai Insurance Launches Crypto Wallet for Premium Payments & Claims
3XRP Whales Buy The Dip While Price Goes Nowhere
4Samsung crushes Apple with over 700 million more smartphones shipped in a decade
5Luxury Meets Hash Power: This $40K Watch Actually Mines Bitcoin
Latest


8
Also read
Similar stories you might like.

Science
Scientists Reconstruct Skull of 1.6-Million-Year-Old Ethiopian Homo Erectus
Shedrach | 2025-12-19

Artificial Intelligence
Scientists Use AI to Crack Nature’s Hidden Laws
Ana | 2025-12-18
Research
Engineers Rewrite Aluminum’s Limits With 3D Printing
Ana | 2025-12-16

Research
Ancient Space Rocks Challenge Asteroid Mining Hype
Ana | 2025-12-15

Artificial Intelligence
New Study Shows AI Can Learn Values Like Children
Ana | 2025-12-12

Research
Ancient Campfire Discovery Rewrites Human Evolution
Ana | 2025-12-12
Research
New Research Links Gray Hair to Lower Cancer Risk
Shedrach | 2025-12-11

Artificial Intelligence
Brain-AI Fusion Leaps Forward With Radical New Chip
Ana | 2025-12-10

Research
Asteroid That Could Hit Earth Also Carries Life’s Seeds
Ana | 2025-12-10

Research
Mars Had Rainforests – New Discovery Hints
Ana | 2025-12-05